This post will discuss how you can setup a basic front-end build for Umbraco or really any web application stack and then build it in Azure DevOps. This post is focused on .NET but could be applied to any stack. You can take the advice from this post and build something more complex if needed. To show how simple the build is, the only npm module dev dependencies I have is sass and minify.
We will run through how to setup the Visual Studio project structure, then set up our package.json to build our client side code and then incorporate the front end build with an Azure DevOps build pipeline. It is presumed you already have some client side code prepared and some experience with Azure DevOps pipelines.
Disclaimer: I am not a front end dev and therefore not an expert with Node. This post serves as a source of inspiration to make something basic grow into something complex. So, there will be some parts that could be done a lot better. I will do my best to highlight these parts.
Node JS Visual Studio Project
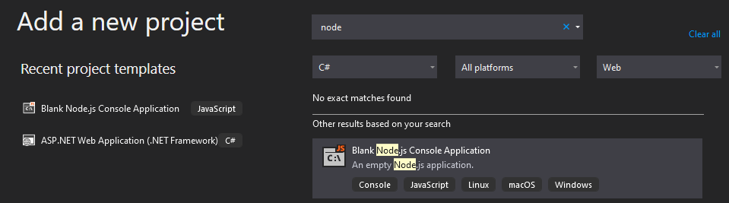
This isn’t 100% required but it’s nice to have, you could just have an empty folder and initialize it with npm by running npm init. This then becomes your home for the front end build. However, in my Solution I have setup a new project called Blank Node.js Console Application:
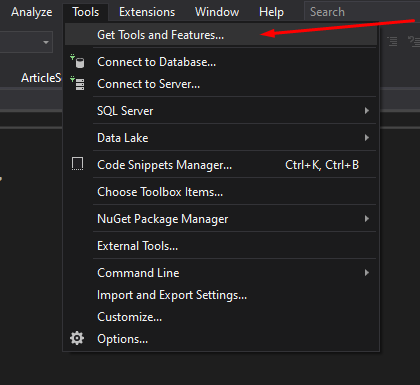
If you don’t have this option, you will need to obtain this from the Get Tools and Features menu:
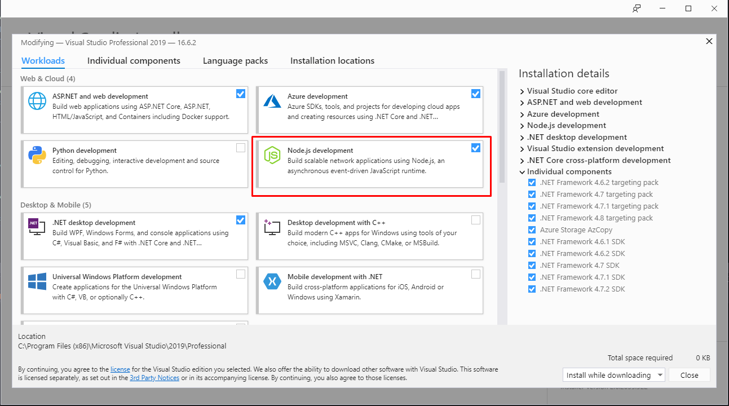
This will load the Visual Studio Installer where you can install the Node.js development workload:
This will allow you to create an empty Node JS application which essentially the same as running npm init. As you go through this post you will end up with a project that looks like this:
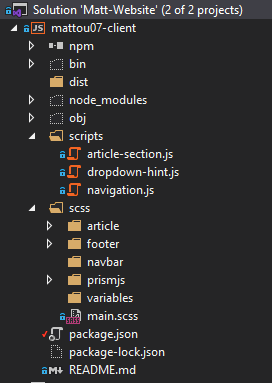
By having a NodeJS project for our front end build we can easily see what node modules are installed and easily add and remove modules if we wanted to within Visual Studio.
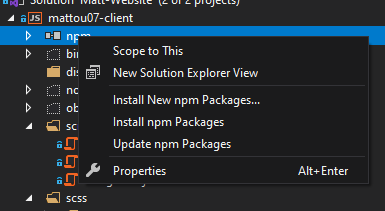
If we Right-Click on npm we get a context menu where we can install new packages, reinstall our existing packages and update our packages.
Moving on, note in the previous screenshot I have two folders scripts and scss. This is where my raw JavaScript and SCSS live.
The package.json
Now onto the brains of the operation the package.json. Here we use simple scripts within our json file to build the JavaScript and SCSS. The final compiled code is then sent to a dist folder in the main Umbraco project.
{
  "name": "mattou07-client",
  "version": "0.0.0",
  "description": "mattou07-client",
  "main": "app.js",
  "author": {
    "name": ""
  },
  "dependencies": {
    "bulma": "^0.9.0",
    "cookieconsent": "^3.1.1",
    "fontawesome": "^5.6.3",
    "prismjs": "^1.20.0",
    "vue": "^2.6.11"
  },
  "scripts": {
    "shrink": "minify scripts/article-section.js scripts/dropdown-hint.js scripts/navigation.js > ../mattou07-v8/dist/js/main.min.js",
    "build-scss": "sass scss/main.scss ../mattou07-v8/dist/css/main.min.css --style compressed",
    "build": "npm run build-scss && npm run shrink"
  },
  "devDependencies": {
    "minify": "^5.1.1",
    "sass": "^1.26.8"
  }
}
The part we want to pay attention to is the scripts section:
"scripts": {
    "shrink": "minify scripts/article-section.js scripts/dropdown-hint.js scripts/navigation.js > ../mattou07-v8/dist/js/main.min.js",
    "build-scss": "sass scss/main.scss ../mattou07-v8/dist/css/main.min.css --style compressed",
    "build": "npm run build-scss && npm run shrink"
  }
The first question that may pop into your mind is why don’t you just use a Task Runner like Gulp or Grunt. Personally, I just wanted to keep my front end build simple. I do not plan to expand further into my front end build yet. I am familiar with the Command Line and this is just easier for me to understand if I were to look back upon sometime later. However, this does not mean you can’t use a task runner. If you decide to use a task runner we will need to adjust a few things so that Azure DevOps will run the gulp file or grunt file. This is explained further on.
Back to the JSON file. I have a command called shrink that will take all my JavaScript and minify it into a single file called main.min.js. However note that the path starts with ../ .
../mattou07-v8/dist/js/main.min.js
I am telling minify to build the Javascript and then send the compiled code to a dist/js folder in my main project where I have my Umbraco code.
The same is happening with my SCSS I have a command called build-scss. I instruct SASS to build my main.scss file and then direct the compiled code into the dist/css folder and compress the CSS to remove the spaces.
To run the frontend build, all I need to do is type npm run build in my command line which will execute my shrink and build-scss commands together in sequence. I know not the best naming… this is just a private repo for myself so feel free to name it how you wish. You can also create a separate command to watch files, you can find out more here: https://scotch.io/tutorials/using-npm-as-a-build-tool This page is where I obtained most of my inspiration for this post.
Azure DevOps
Before discussing the Build Pipeline, I would like to discuss some pain points I experienced when setting this up.
I can’t build to my destination folder because the folder is not in the repo
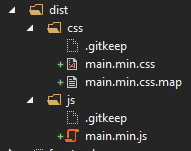
If you ran into the issue that I did where minify failed because the destination folder didn’t exist during the Azure DevOps build. Then you need something called a .gitkeep file.

In your destination folder simply create an empty file called .gitkeep and then commit it. This will allow the folder to exist in the repo so your front end build can work without having to pollute the build process with a create folder command. DO NOT include the .gitkeep file into your project otherwise the file will appear in your web root. It should look like this in Visual Studio:
Include the front end compiled code in the project but do not commit it
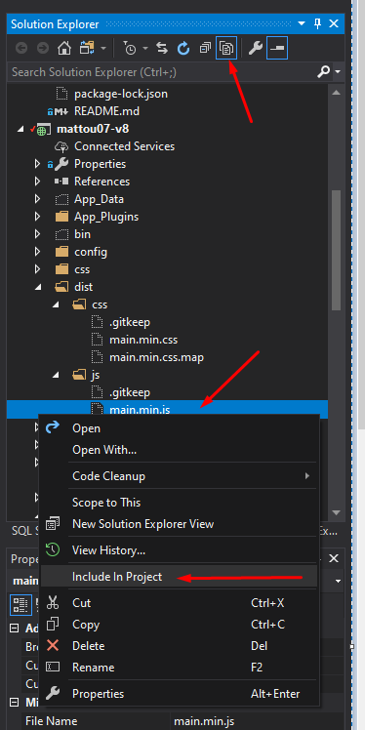
Do not commit the minified CSS and JS files into your repo! Instead just include the files into the project. Its unnecessary to commit minified files as it doesn’t add any value and makes checking git differences harder. To do this make sure show all files is enabled and then right click on your CSS and JS files and click Include In Project. As shown in the screenshot:
Setting our NodeJS project to not build
Before we can run this project in Azure DevOps, first we need to ensure that the NodeJS project is set to NOT build. We are using the NodeJS project as a home for our front end build and are copying the compiled files across to our Umbraco project so there’s nothing that MSBuild needs to do with the project.
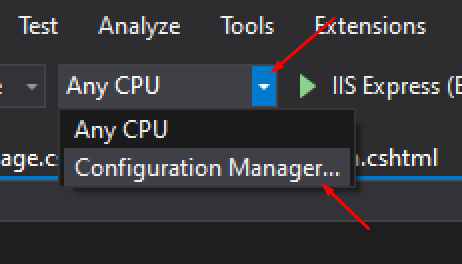
To do this head to Configuration Manager by clicking the dropdown arrow near your build button at the top of Visual Studio, then click Configuration Manager:
Then ensure the Active Solution configuration is set to Release and then untick the build checkbox. This will instruct Azure Devops to not build the project when the Solution is being built.
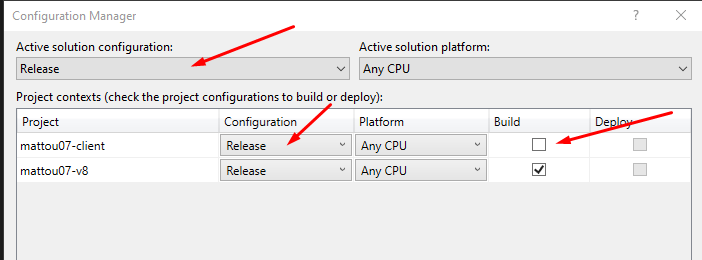
Make sure to commit the updated .sln file to source control as that file will contain your Configuration Manager changes.
Configuring the YML file to run our NPM scripts
Next, we need to update the YML file to install the npm packages and then run our npm scripts during the pipeline build. If you already have a YML file created. Simply adding the following tasks and editing the working directory will be enough. However, you could also do this on the Azure DevOps website if preferred.
Via the Azure DevOps Website
To edit your YML file in Azure DevOps, click Pipelines, then on your Pipeline click the 3-dot menu and then click edit:

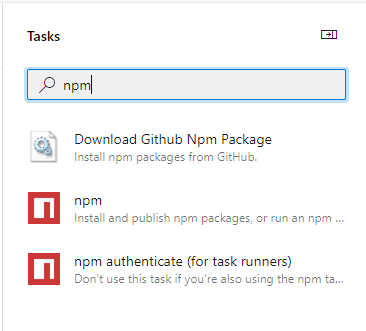
This will open your YML file on the left, and on the right you can search for Tasks. Tasks is where we can add our NPM commands, simply typing npm will show the tasks available:
Clicking on the npm Task will provide us with these options:
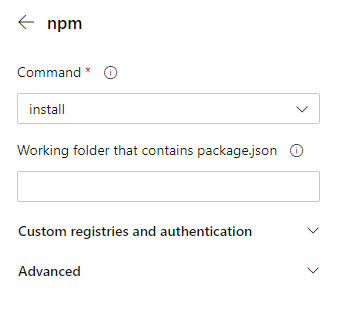
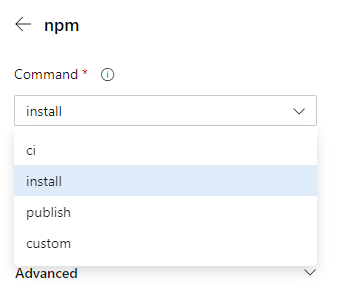
Clicking on the Command dropdown provides with more npm commands, for now leave it as install. This will run npm install on the target Working folder that you need to provide.
Ensure your package.json is in that working folder. Then click add.
Small tip before clicking add, make sure you click where you want the task to be added in the YML file. Looking at the screenshot below:
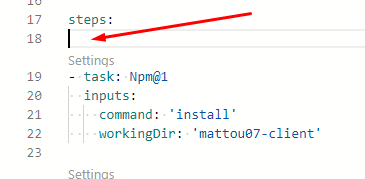
I clicked on line 18 and now the cursor is now targeting that line. When you click Add on the npm task it will add it on that line and not to the end of the file.
Next we need to invoke our build command npm run build I achieve this by running the command line task. Previously I had issues getting this to work with the npm custom task so I resorted to using the Command Line task. However I managed to figure it out and discuss npm custom tasks further on in the post.
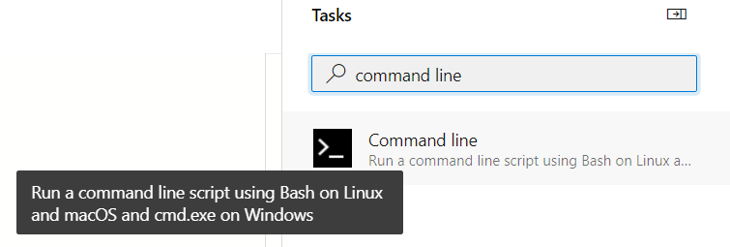
Search for the Command Line task in DevOps:
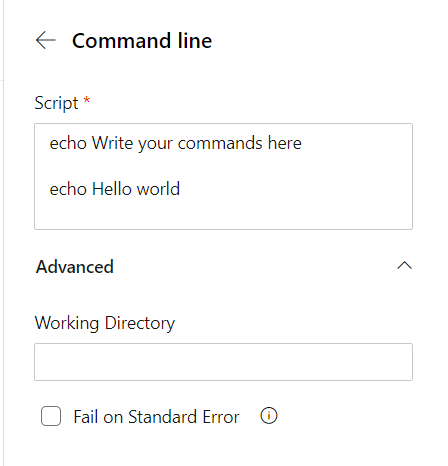
Then add the npm run build command to the Script text box and specify the working directory for your front end build:
That should be everything needed for the pipeline to build your front end code and store it in the dist folder of your Web Application.
Using a Task Runner
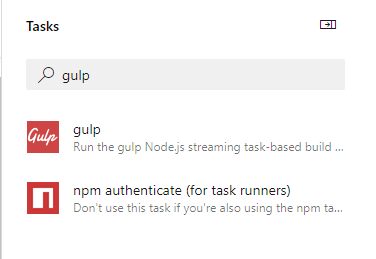
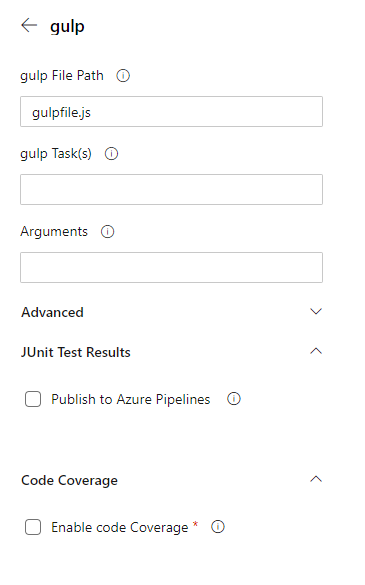
If you want to use Gulp there is a task for that as well. It’s the same process as setting up the npm task. Search for Gulp and open the Gulp Task:
Ensure you provide the correct path to the gulpfile and the names of the tasks you would like to run:
There is also a grunt task if you prefer to use grunt.
Manually edit the YML file
If you want to edit the YML file locally and not with Azure DevOps. Below are the two tasks I needed to run my front end build:
steps:
- task: Npm@1
  inputs:
    command: 'install'
    workingDir: 'mattou07-client'

- task: CmdLine@2
  inputs:
    script: |
      npm run build
    workingDirectory: 'mattou07-client'
In the two tasks above make sure to change the working directory to be the folder that contains your front end build files (npm folder). The first task runs npm install. The second task opens Command Prompt and runs npm run build which then runs my minify and Sass commands I mentioned previously. Again, make sure the working directory is set properly. Its also a good idea that these tasks run before the main .NET project is built
If you remember in the previous screenshot for the npm task there was an option called Custom:
Instead of using Command Line task you could also use the npm Custom task to run our npm scripts. I am showcasing both to provide more options in how you want to build your code.
Below is the YML syntax for the npm custom task, note that I prefixed my command with run, this is equivalent to the full command npm run build:
- task: Npm@1
  inputs:
    command: 'custom'
    workingDir: 'mattou07-client'
    customCommand: 'run build'
Using a Task Runner
Azure DevOps contains tasks to run a gulp build and a grunt build. However, I have only worked on projects using Gulp as the front end task runner. If you use a different task runner you may need to either invoke the command line or Azure DevOps may support your task runner if you search for it. Regardless, below is a YML sample for running Gulp:
- task: Npm@1
  inputs:
    command: 'install'
    workingDir: 'front-end-folder'

- task: Gulp@1
  inputs:
    gulpFile: 'front-end-folder'\gulpfile.js'
    targets: 'prod'
    enableCodeCoverage: false
Like previously we run our npm install task and then run the gulp task specifying the location of the gulpfile and the gulp task we want to run. This may be similar for grunt but again I am not familiar with grunt to discuss it.
End
Congrats, you now have a simple front end build for your Web Application that you can build locally and build within Azure DevOps. Keeping your front end code and backend code separated.