This post will describe how to create a self-signed certificate to be used for a local website hosted in IIS. It is assumed you are running Windows 10 with Administrator privileges and have .NET Framework installed. These commands may not work for prior versions of Windows. If you are looking for a more complete script to setup a local IIS site with multiple domains all configured with self-signed SSL. You can find my IIS Builder Powershell script here: https://github.com/mattou07/iis-builder.
Prerequisite
Before we start, we need to know what our binding (hostname) will be for the IIS site. For my example we will have the binding mattou07.localtest.me (The localtest.me domain was kindly provided as a wildcard DNS where any subdomain points to 127.0.0.1, you can read more here https://readme.localtest.me/). If you want to use a different domain, you will need to make sure its pointing to 127.0.0.1 in your hosts file.
Before running any of the IIS commands please ensure you open Powershell as Admin and import the WebAdministration module first (You may run into issues with Powershell 7):
Import-Module WebAdministrationCreating a self-signed certificate
The following powershell command will create our self-signed certificate for our binding and store it in the Personal Store (Note how I also store a reference to the certificate in a variable called $cert this will be needed further on):
$binding = "mattou07.localtest.me"
$cert = New-SelfSignedCertificate -DnsName "$binding" -CertStoreLocation "cert:\LocalMachine\My"
However, this is not enough to make the certificate work for HTTPS in our browser. We need to add our newly created certificate to the Trusted Root Certificate store. To do this we take our $cert variable which references our created certificate and add it to our Trusted Root Certificate store like so:
$DestStore = new-object System.Security.Cryptography.X509Certificates.X509Store([System.Security.Cryptography.X509Certificates.StoreName]::Root,"localmachine")
$DestStore.Open([System.Security.Cryptography.X509Certificates.OpenFlags]::ReadWrite)
$DestStore.Add($cert)
$DestStore.Close()
In terms of creating the self-signed certificate that’s it! You now have a valid self-signed certificate for your binding, created and trusted on your local machine. You can now manually add this certificate to your binding in IIS. I will continue to discuss how to add the certificate to IIS using Powershell commands below.
Creating our IIS site with HTTPS bindings
Create App Pool
First, we will create the App Pool, if you already have an app pool created you can skip this. The $runtimeVersion is the .NET Framework runtime you want the pool to run, you could use a later version if you wanted. However, it needs to be installed on the machine before it can be used.
$appPoolName = "mattou07-pool"
$runtimeVersion = "v4.0"
$appPool = New-WebAppPool $appPoolName
$appPool | Set-ItemProperty -Name "managedRuntimeVersion" -Value $runtimeVersion
The above code will create our app pool named mattou07-pool running version 4.0 of the .NET Framework.
Create IIS Site
We now need to create our IIS site, to do so we need to assign a normal HTTP binding first. The Powershell below will take our previous variables and use the New-Website commandlet to create our IIS site.
$appPoolName = "mattou07-pool"
$binding = "mattou07.localtest.me"
$siteName="mattou07-web"
$webRootPath="L:\dev\mattou07"
New-Website -Name $siteName -PhysicalPath $webRootPath -ApplicationPool $appPoolName -HostHeader $binding
Adding multiple bindings
To add additional bindings, you need to use a separate commandlet to do this called New-WebBinding. The below Powershell will add an additional HTTP binding called mattou07-second.localtest.me to the site we created previously:
$siteName="mattou07-web"
$binding2 = "mattou07-second.localtest.me"
New-WebBinding -Name $siteName -IPAddress "*" -Port 80 -HostHeader $binding2
Assigning HTTPS bindings to our IIS site
To get the binding to work under HTTPS we need to add a separate HTTPS binding and then assign our certificate to that binding. The Powershell below will create our HTTPS binding and add our self-signed certificate we created earlier:
New-WebBinding -Name $siteName -Protocol "https" -Port 443 -IPAddress * -HostHeader $binding -SslFlags 1
(Get-WebBinding -Name $siteName -Port 443 -Protocol "https" -HostHeader $binding).AddSslCertificate($cert.Thumbprint, "my")
I no longer have the certificate referenced
If you no longer have the $cert variable you can easily get the thumbprint using this Powershell to get the certificate by its Subject name (the binding) and then obtain the Thumbprint.
$binding = "mattou07.localtest.me"
$cert = Get-ChildItem -Path Cert:\LocalMachine\My | Where-Object {$_.Subject -eq "CN=$binding"}
$cert.Thumbprint
One thing to watch out for is if there are multiple certificates with that subject name. Powershell will return multiple certificates as an array. You will need to target a specific one in the array like so or delete the duplicate certificates:
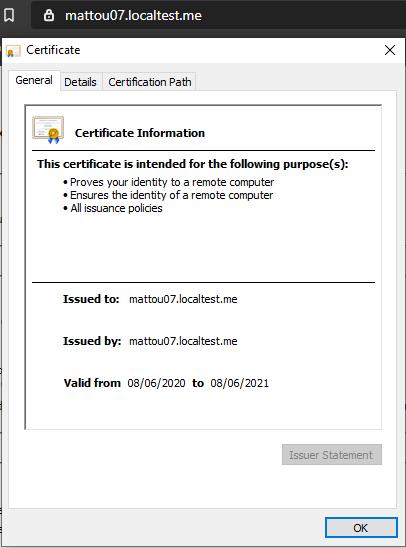
$cert[0].ThumbprintThe end result should be your domain now working with SSL pointing at your local IIS site.
The end
Again if you are looking for a script that is more complete and is actively being used by others then check out my IIS Builder script here: https://github.com/mattou07/iis-builder Give it a star if you like it!
Feel free to tweet me if you found this post useful or if you notice an issue in the post. Thanks for reading!