Follow these screenshots to enable SSL in your Web Project:
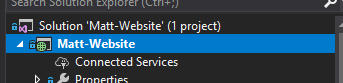
1. Select your web project by clicking it once. You should then see the Properties Window just below the solution explorer.
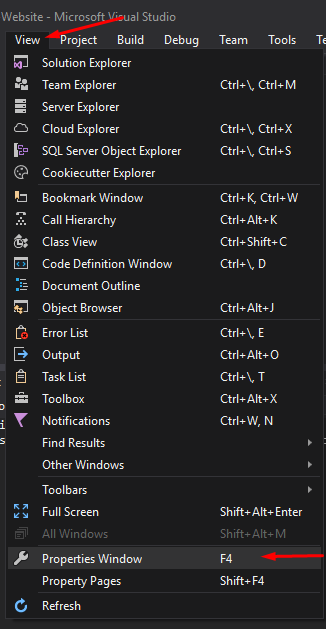
Can't see the properties window?
If you can't see the properties window, with the project selected go to the top navigation menu and click View > Properties Window:
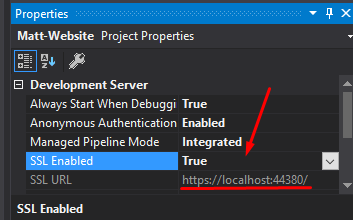
2. In the properties window you should see the setting SSL Enabled set that to True.
The SSL URL should then appear, copy it to your clipboard.
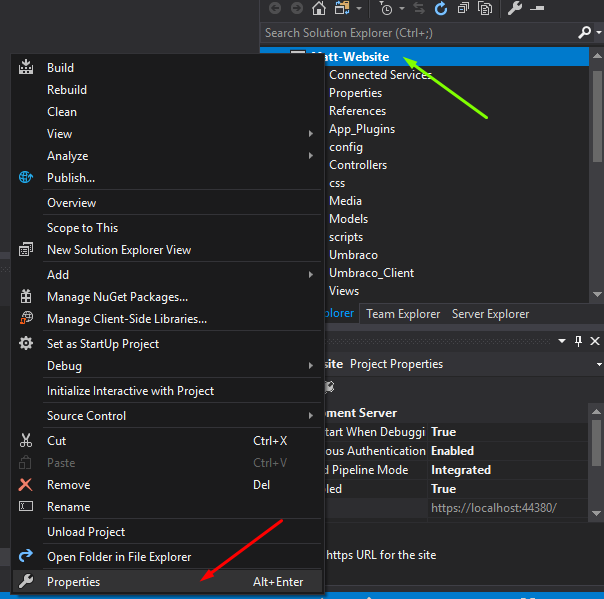
We now need to open the Properties of the Web Project. Simply right click the project (Green Arrow) and click properties (Red Arrow).
This is different to the Project Window we opened earlier.
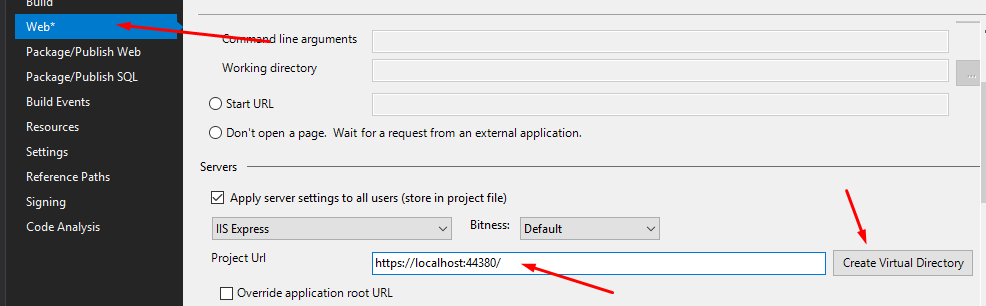
Click Web on the menu to the left
Paste the SSL Url into the Project Url and then click Create Virtual Directory.
Lastly click save all in the navigation menu.
That's it!
When you build and run the project your browser will automatically head to the Project Url you specified.